FAQ's - Why make stamped jewelry?
Isn't it "cookie cutter" art?
Isn't it repetitive & boring?
Isn't there so much of it out there already?
No.
No.
No.
And yes.
I make personalized jewelry, especially my Mommy Bling line, because it has meaning to the wearer.
It started with a baby shower present for my friend.
When she saw it, she had tears in her eyes.
That did it for me.
I'm a classic "people pleaser". She loved it, so it made sense that others would, too.
I live for positive feedback!
So... whether I'm making a Mommy Bling necklace, bridesmaid jewelry,
flower girl jewelry or remembrance jewelry,
the piece will mean something to the person who will wear it.
Therefore, I make each piece with care.
I treat every one as if it were mine.
A lot of effort goes into each one.
There are a lot of stamped jewelry artisans out there.
Most use pre-made sterling blanks.
These are usually at the thickest, 20 gauge pieces (.02 mm) of 92.5% silver.
Mine are handcrafted 99% silver 3-4 mm thick pendants.
I don't just stamp something I buy.
Let me share the process of making them with you.
It all starts with silver clay.
Silver clay is made of tiny bits of silver (sometimes recycled from x-rays) imbedded in a glue binder.
It looks like clay.
It dries way faster.
You can create any shape you want...
I use a circle template most often for my Mommy Bling pendants.
I roll out the clay onto texture plates.
The heart leaf is the most popular one. Moms like it.
I draw the heart (or tree or whatever the customer wants!) with a syringe filled with silver clay slip.
I use metal stamps for the lettering.
Once I get the basic shape achieved, it goes onto a cup warmer to dry.
These ones are dry:
Notice the rough edges.
Those have to go!
I use a file to carefully take off the rough edges and obvious imperfections.
The pieces are very fragile at this point.
You have to sand very carefully.
After using files, I use sanding cloths to smooth them even more.
There are four different bites of sanding cloth from rough to fine.
I use them all.
Notice the fine silver dust on my fingers.
I use dental tools looking through a magnifier to fix small imperfections.
On this one, for example, I was shaving down the heart on one side to shape it better.
 |
| Before |
 |
After
|
Here's my workspace when I sand:
The bowl catches the dust. It's recycled back into silver clay.
The brush and water is used to smooth areas that need it. I use both the large file you saw earlier and the mini files in the antique blue glass ink well you see in the photo.
And of course, coffee to keep me going...
This is the dust collected from sanding a few pieces.
Just add water and a little oil to reconstitute to use for repairs.
Silver is over $30.00 an ounce... and there is a finite amount of it on earth.
Recycling it is a must.
Time to put the sanded pieces into the kiln.
They fire at 1700 degrees for an hour.
It makes my studio toasty warm on a cold day!
This is what they look like coming out of the kiln.
Think they're finished?
Nope!
This is when the HARD work starts!
Fine silver is 99% pure silver. The more pure a metal, the softer it is.
The first step is to work harden it a bit.
I hammer them lightly on both sides.
They go from being so soft that you could bend them with your fingers
to being the hard pendants we're used to.
They come out of the kiln with a sparkly patina on them.
I use a steel brush to get down to the shiny silver.
Pendants need a hole to put a jump ring through to hang them.
I either use this gizmo to screw a hole into them or carefully drill them.
The leftover "doughnut hole" goes into a container for recycling or fusing onto another piece later.
Now comes the "bath" in liver of sulphur and water.
This turns the piece different colours - eventually black.
I let them soak until they are black.
Just out of the liver of sulphur:
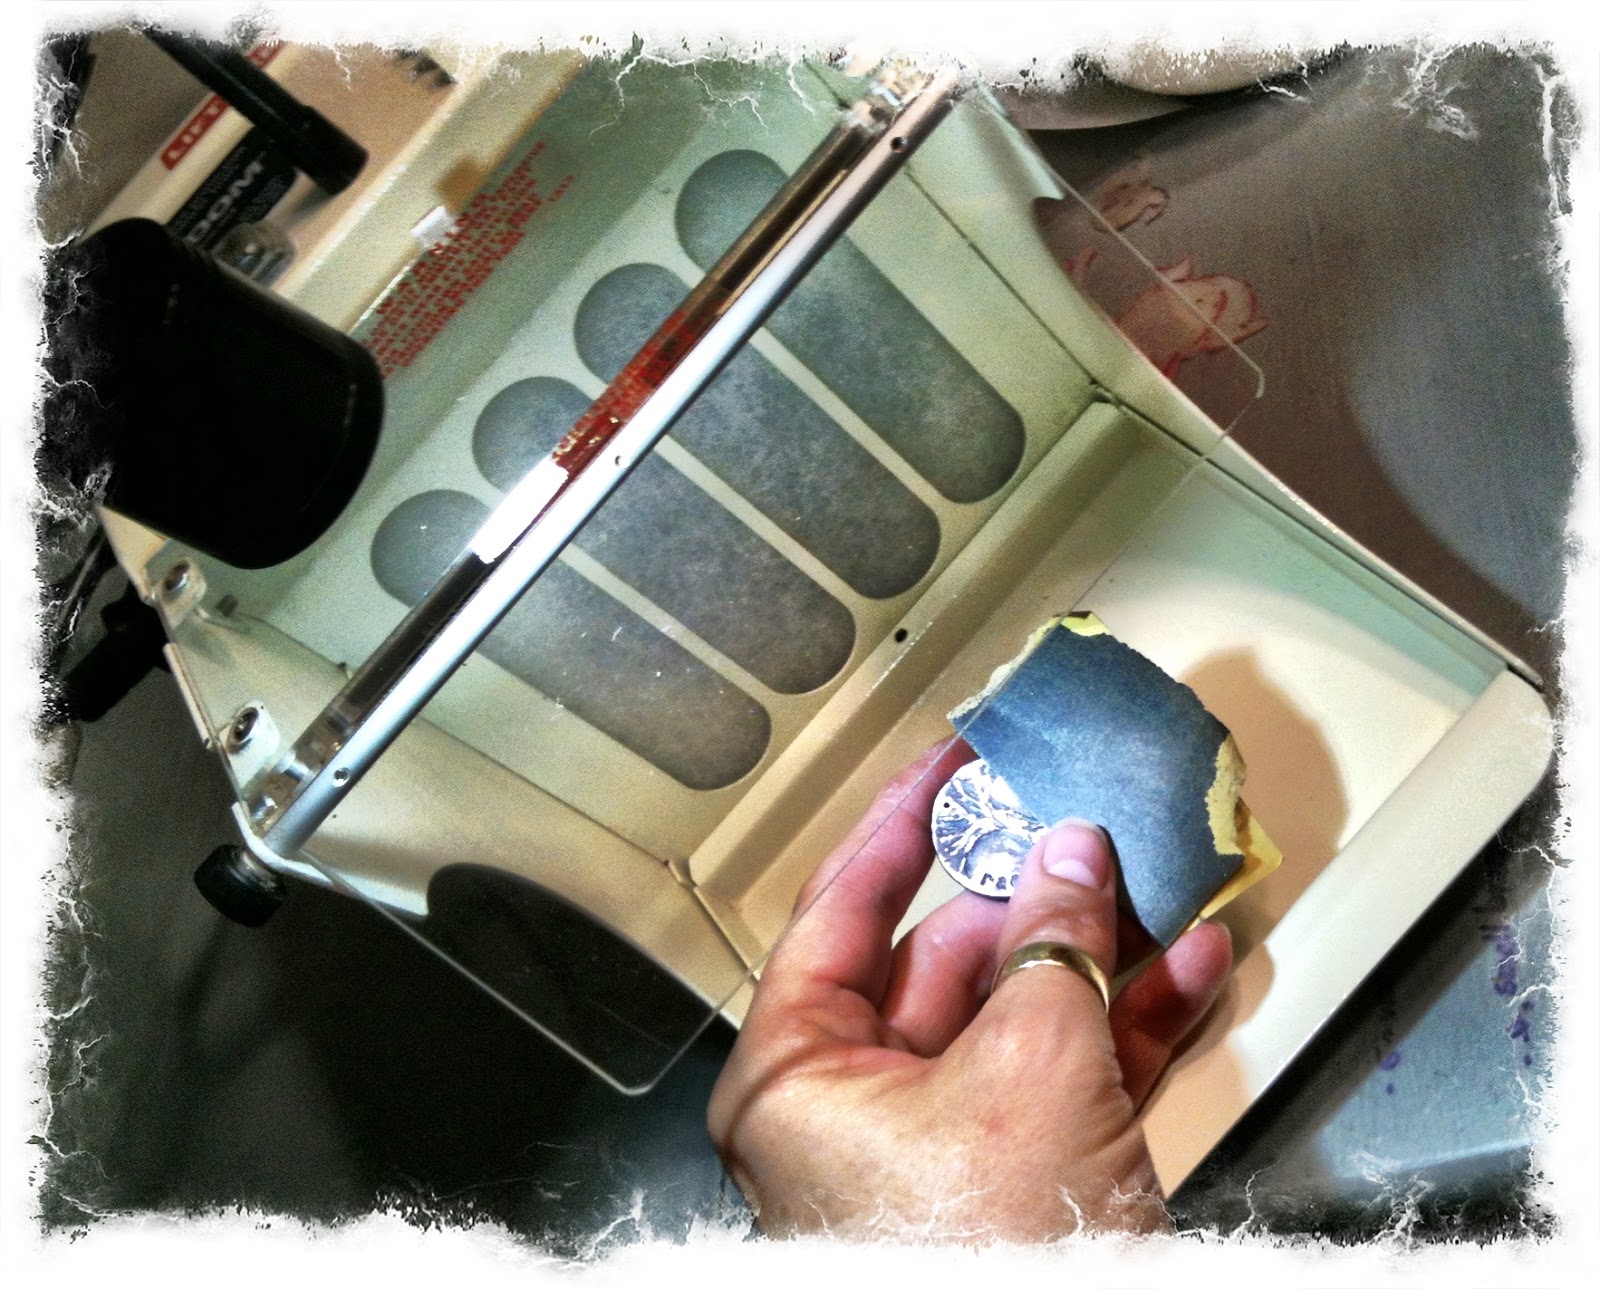
Now I sand the pieces so that the letters and details remain blackish, but the rest becomes shiny.
I start with 1200 sandpaper.
Notice the handy dandy sanding booth I use!
(Thanks E.S. Laird staff!)
It is a fan with a light above. (That's the black thing coming in from the left).
The filter catches the silver bits as I'm sanding.
Believe it or not, you can send the filters in to have the silver bits recycled!
After the sand paper.
Now I use my Dremel with rubber sanding wheels.
There are three different wheels that go from rough to smooth.
Each wheel is about $9.95 and I go through one every 20 pieces or so.
On this piece, there were some areas that I wanted to smooth out a bit more.
I used a pumice stone drill to get into really little places.
Then the rubber wheels again.
Hammering the piece makes the outside a bit irregular, so I use my file to make it rounded again.
Next, I burnish the flat areas. This burnisher is real stone - agate - that is very smooth. The stone is pushed over the surface, crushing and smoothing any bits sticking up. It makes a very smooth and shiny surface.
After the burnisher, it's the sanding cloths.
All four of them.
Some people would stop at the rubber wheels, but remember, this pendant is going to be special for the person who wears it! It has to be treated with love.
Here's how the back is looking so far.
Remember me telling you that most artisans doing stamped jewelry use sterling sheet blanks?
Well, they won't have a pretty textured back.
In fact, you'd likely see the stamped letters coming through the plain back.
If your necklace turned around, (and it will!), wouldn't you rather see this?
After all that polishing, the letters and the tree didn't stand out as much as I'd like, so I painted the liver of sulphur solution over them one more time, just to blacken the indented parts.
One more go with the sanding cloths to get any liver of sulphur that went where I didn't want it...
Now the magic happens.
I assemble the necklace with the pendant:
This was a custom piece.
They usually look more like this:
Or this:
I use natural semi-precious or precious stones for birthstones.
I use the most beautiful sterling silver chain... It's an antiqued open link chain from Nina Designs.
It suits the rustic look of the pendants.
And it's strong.
I buy it by the foot, so I can make a necklace any length you want.
The sterling lobster clasp can be hooked to any of the larger links,
so the customer can wear their necklace short or long to suit their outfit that day.
The chain length I use is typically 20" for the single pendant and 22" for the double and triple pendants.
I always add a bonus natural stone at the end of the chain.
It's just a nice detail.
It is said that the more the human hand touches something, the more meaning it has.
It gains a story.
No wonder I love antiques!
No wonder I love to put so much effort and time into my personalized pieces.
I want them to tell your story.
I want you to tear up in joy when you see it.
One last FAQ:
Can't I get a stamped necklace for a lot cheaper from other jewelry artisans?
Sure you can!
But would you want to?
Personalized jewelry...
Made for You.